Schedule it. Run it.
Watch it leap.

A lightweight, self-hosted job scheduler with a real-time web dashboard. No Redis, no Celery, no complexity — just Python, SQLite, and your browser.

Python 3.8+ FastAPI SQLite MIT License
Everything you need. Nothing you don't.

CronFrog is designed to be simple, powerful, and self-contained. No external infrastructure required.

Real-Time Log Streaming

Watch your jobs execute live via WebSockets. Standard output and error streams are pushed to your browser instantly — no polling, no refresh.

🗃️

Zero-Config Storage

Uses SQLite for persistence. No database server to install, no connection strings to configure. Your data is stored in a single portable file.

⏱️

Cron Expression Builder

An interactive visual builder for cron expressions. Pick from presets (minutely, hourly, daily, weekly, monthly) or write your own custom expression.

🖥️

Modern Web Dashboard

A responsive single-page application with job statistics, execution history, status badges, and an integrated live terminal view.

🔌

REST API + Swagger

Full REST API with auto-generated Swagger UI documentation at /docs. Create, manage, and trigger jobs programmatically.

🐍

Single-Process Architecture

The HTTP server, background scheduler, and job executor all run in one Python process sharing one asyncio event loop. Deploy with a single command.

Version 1.0.1 Latest

Timezone-aware scheduling, one-off date triggers, and full run history — all in a single release.

📅

Specific Date & Time Scheduling

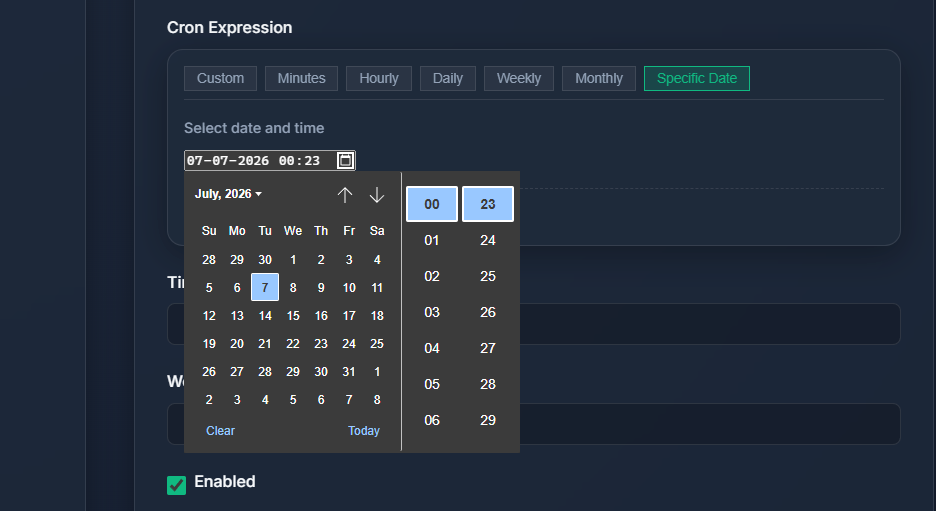
Schedule one-off jobs at an exact date and time — no cron expression needed. Pick your date from a native calendar widget and CronFrog handles the rest using APScheduler's DateTrigger. The input defaults to your current system time for quick setup.

DateTrigger Calendar Picker One-off Jobs
Date and Time Picker for scheduling one-off jobs
🌍

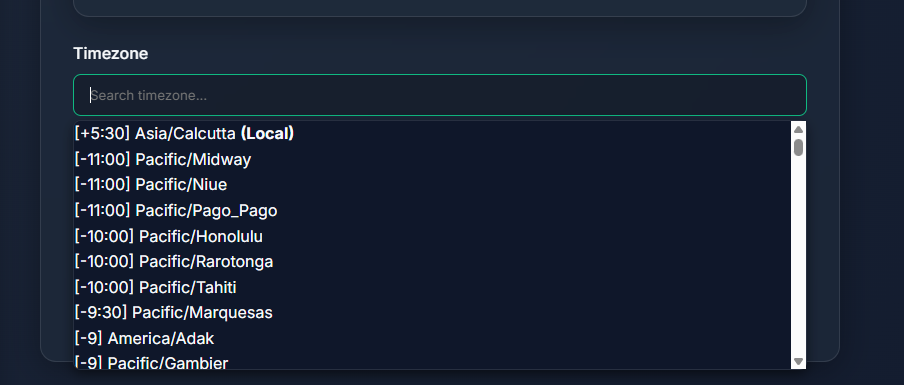
Searchable Timezone Selector

Every job can now run in a specific timezone. A fully searchable dropdown lists all IANA timezones with their UTC offsets (e.g. [+05:30] Asia/Kolkata). Your local timezone is auto-detected and pinned at the top for quick access.

IANA Timezones UTC Offsets Auto-detect Local
Searchable timezone selector with UTC offsets
📜

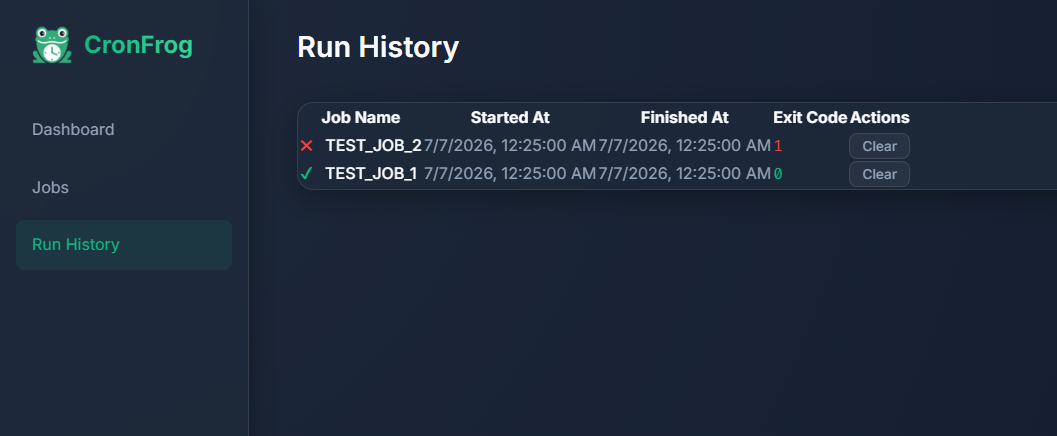
Full Run History

A dedicated Run History page in the sidebar tracks every job execution — successful or failed. Color-coded status indicators (✔ pass, ✖ fail) make it easy to spot issues. Clear individual runs or wipe the entire history with one click.

Pass / Fail Tracking Bulk Clear Cascade Delete
Run history page showing passed and failed job runs

From dashboard to live terminal in five steps

A quick visual guide to creating and monitoring your first scheduled job.

1

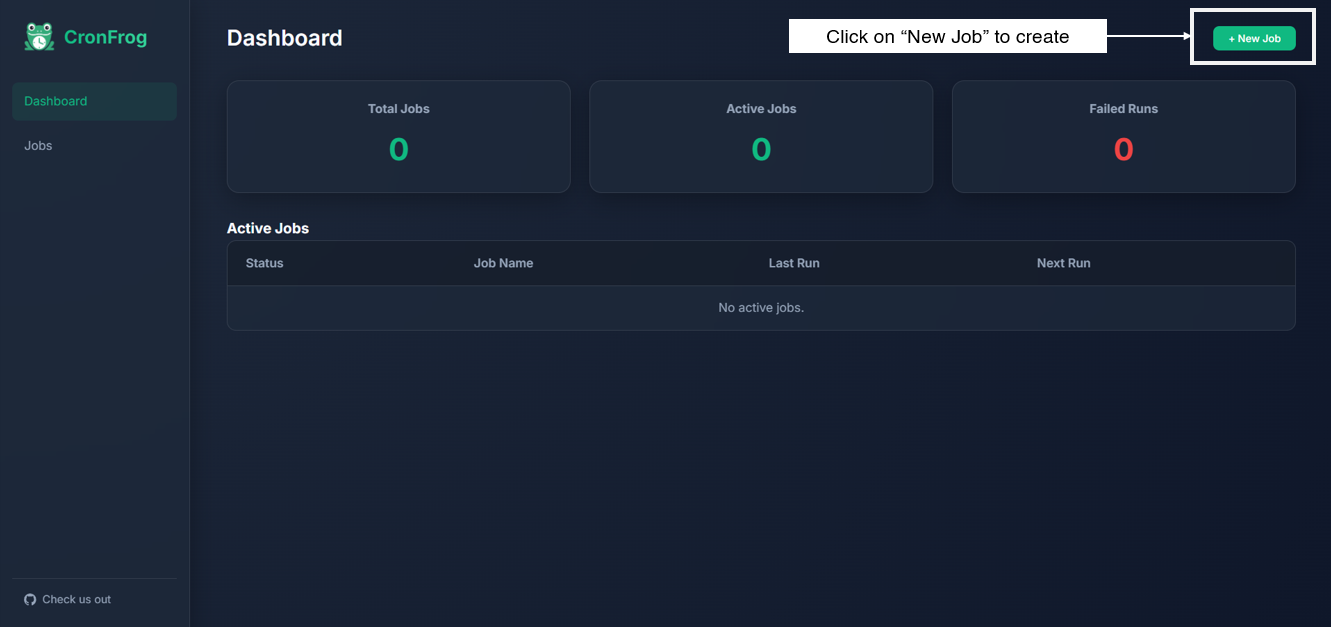
Open the Dashboard

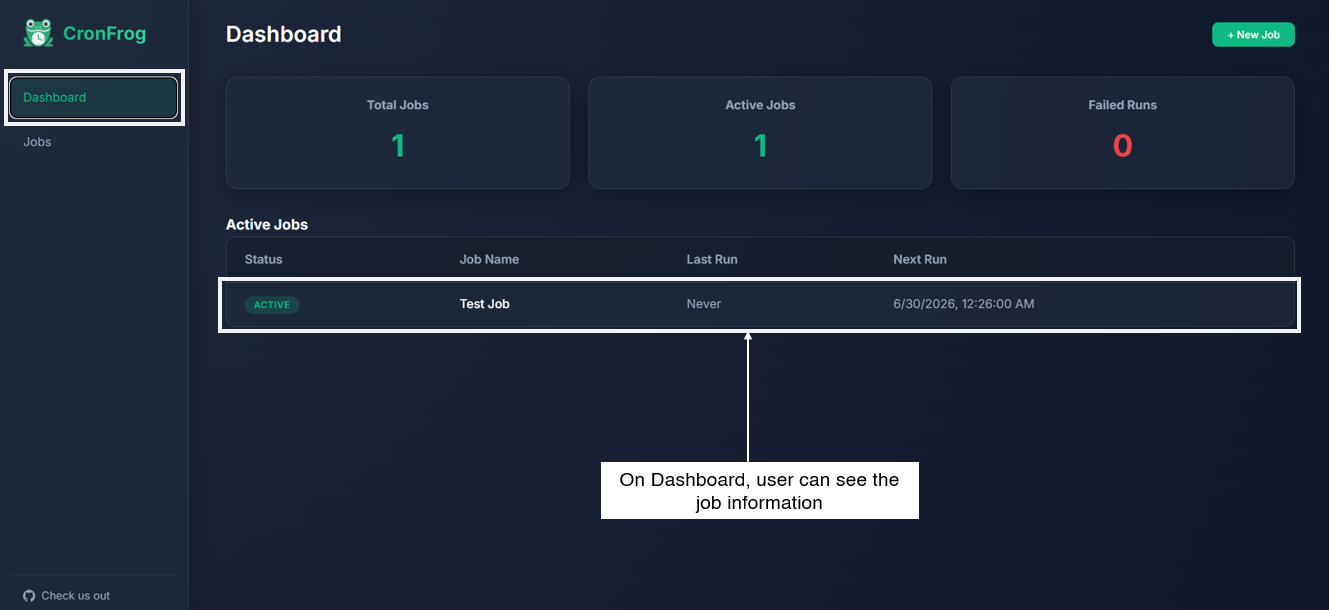
Navigate to your CronFrog instance. The dashboard shows aggregate stats — total jobs, active jobs, and failed runs — along with a table of all currently active jobs and their next scheduled run time.

CronFrog Dashboard Overview
2

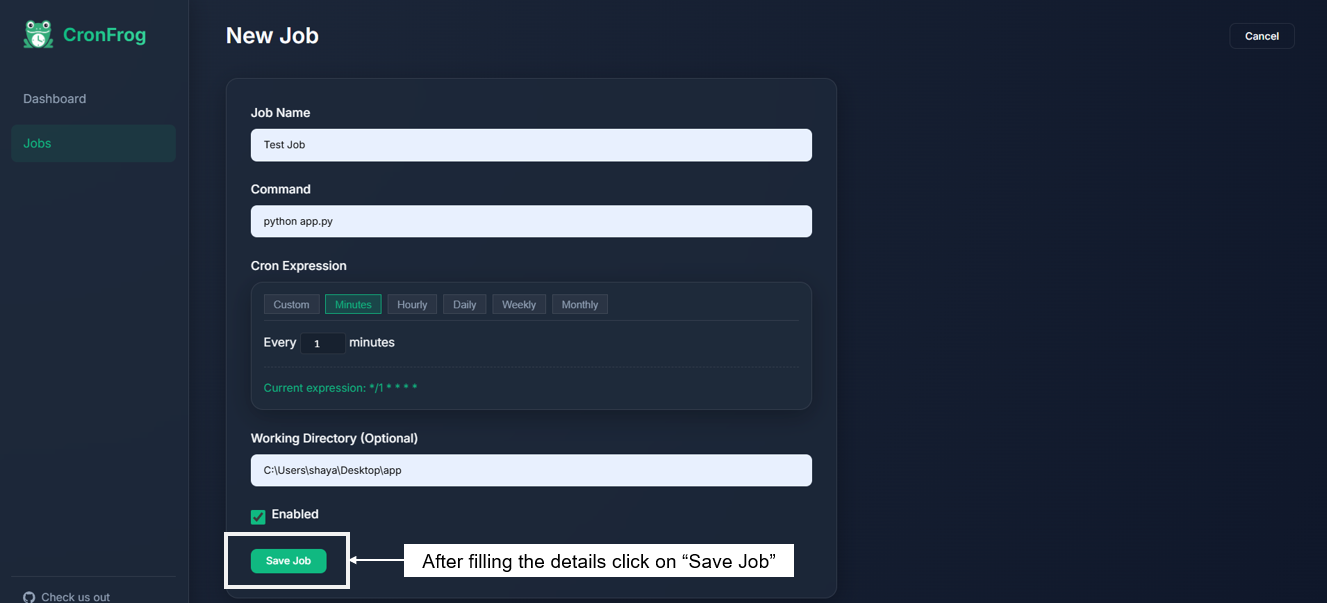
Create a New Job

Click "New Job" and fill in the name, shell command, and cron schedule. Use the interactive cron builder to pick a preset (every 5 minutes, daily at midnight, etc.) or type a custom expression.

Create a New Cron Job
3

Manage Your Jobs

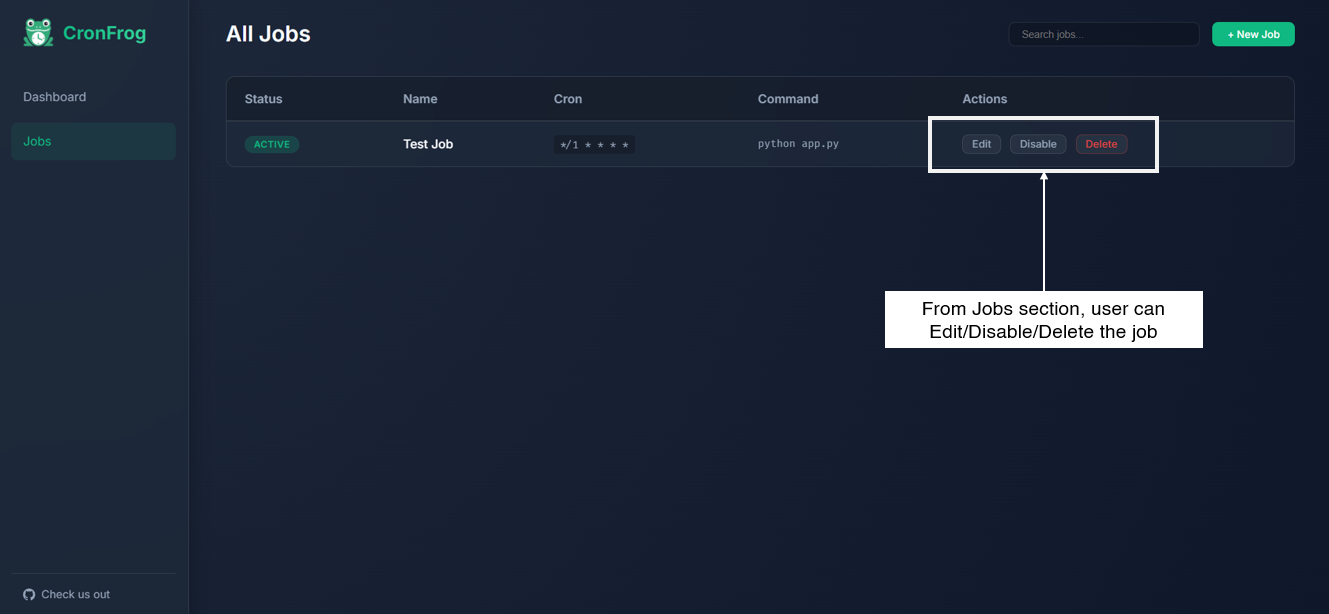
All jobs appear in the Jobs list. From here you can enable, disable, edit, or delete any job. You can also trigger a manual run at any time with one click.

Job Management List
4

Monitor Job Status

Status badges update in real time. Green means active and healthy, amber means currently running, and red indicates the last run failed. Check the next-run time at a glance.

Job Status Monitoring
5

View Live Execution Logs

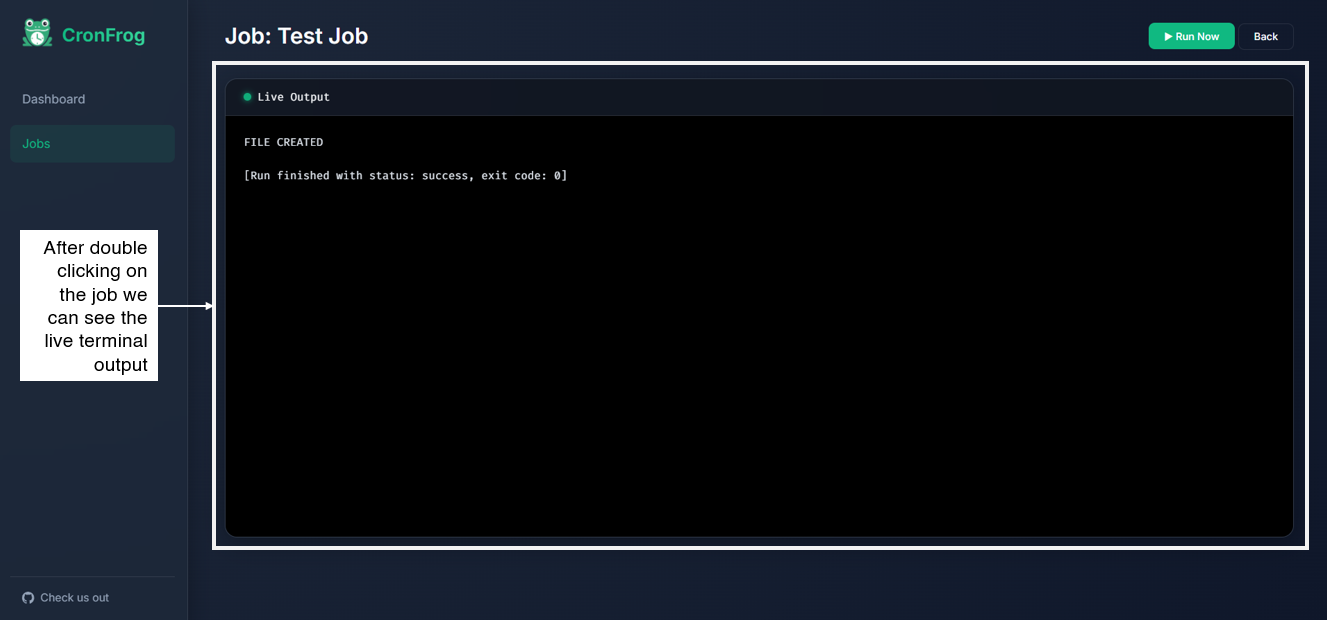
Click on any job to open the live terminal. Standard output streams in real time via WebSocket. Errors are highlighted in red. The terminal auto-scrolls unless you scroll up to inspect earlier output.

Live Execution Terminal

Up and running in under a minute

Clone, install, run. That's it.

1 Clone the repository

git clone https://github.com/shayansaha85/cronfrog.git
cd cronfrog

2 Create a virtual environment

# Create the environment
python -m venv venv

# Activate on Windows (PowerShell)
venv\Scripts\activate

# Activate on macOS / Linux
source venv/bin/activate

3 Install dependencies

pip install -r requirements.txt

4 Start the server

python run.py

The server starts on port 8000 by default. Open http://localhost:8000 in your browser.

Custom port: $env:PORT=8080; python run.py (Windows) or PORT=8080 python run.py (Linux/macOS)

View Full Documentation View on GitHub